Friday, January 23, 2009

Collection: Tomica Limited 0045 Skyline Silhouette

Photobucket
Photobucket

I acquired this rare TL model from loon, a friend from Penang and forumer at HWCMalaysia and LYN. He had a good deal to ship in 6 of these, so he rounded up another 5 interested people to pool our resources and ship them in. Thanks bro!

Apparently this model is based on the R31, which like most Skylines, have been used for racing. Seen here this model shows off its racing livery and body kit. I'm glad to have got this model, it isn't even listed on ToyEast or eBay anymore! :-)

Pictures of this Skyline below are together with my Lancer Evo VII Rally custom.

Photobucket
Photobucket
Photobucket

Friday, January 16, 2009

Kustom RideZ: 2006 Honda Civic Si

Kustom RideZ

The Honda Civic Si custom that I have used for illustration purposes in the Kustom Methods segment is done! :-)


hauler carrier

This is actually a request for a simple customization from a friend, addrick. He wanted the Civic casting to mimic his real life Civic in terms of colour and styling. So here is the final product! To some of you guys who have been following the Kustom Methods segment do not worry, I will continue to post on methods to help you complete your customs.

Enjoy the pictures!

Photobucket
Photobucket
Photobucket
Photobucket
Photobucket
Photobucket
Photobucket
Photobucket
Photobucket
Photobucket

Tuesday, January 13, 2009

Kustom Method: Painting (Exterior)

KM tag

On this post we will tackle painting. If you have prepped the body properly, there shouldn't be too much problem painting. First of all I must let you know this method of painting is using a spray can. I have not used airbrushes, therefore have zero experience in it. :-)

Photobucket
From left to right: Primer, Colour & Gloss Spray Cans.

So, first of all there will be the list of things you need:
1. Paint Primer - Spray Can
2. Paint - Spray Can
3. Gloss/Clear Lacquer - Spray Can
4. Paint Stand
5. Masking Tape (Optional)
6. Hair Dryer (Optional)
7. High grit sandpaper (About 1500 - 2000)
8. Water
9.. Your die cast (Optional... no wait, this is compulsory!) :-P

In this blogpost I will be using pictures from my past customs to illustrate my point.

custom mustang gt
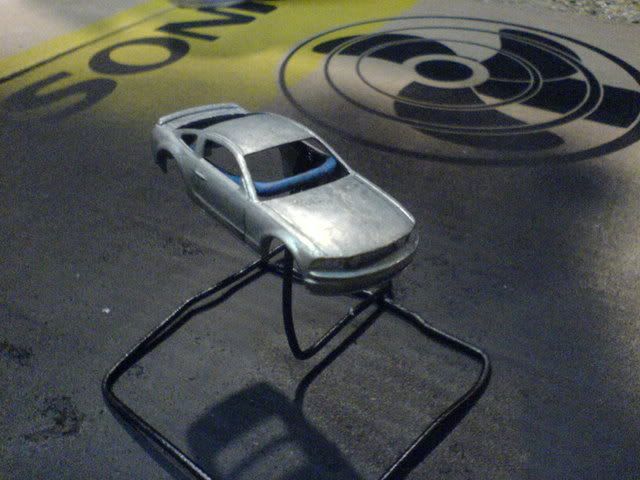
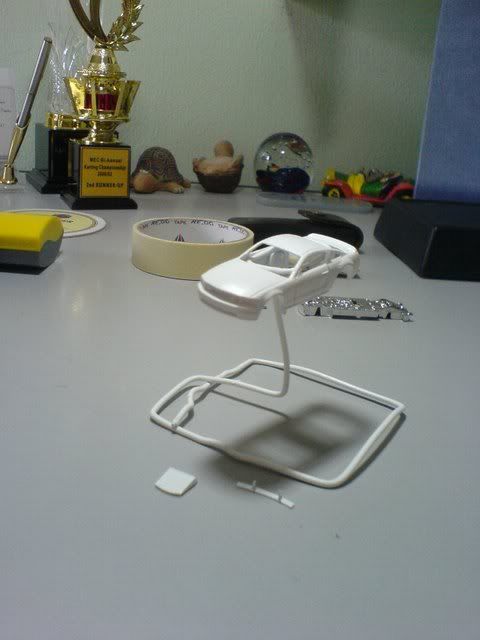
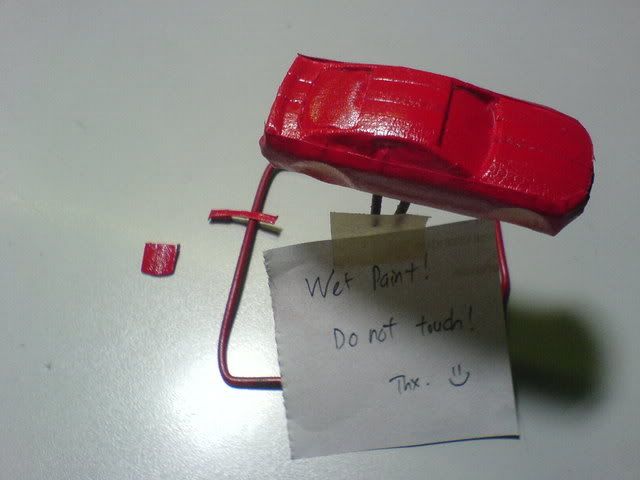
A Mustang GT die cast on a paint stand.

Right then, first of all you will have a your die cast body stripped of all its paint and sanded smooth. When spray painting you die cast, here are a few guidelines to help you get a nice coat of paint:

1. Spray on a sunny day, you will need the sun to help you dry the paint.
2. Pick an open area, do not spray in an enclosed area where you may be poisoned or spray colour/primer/gloss onto things you did not want recoloured.
3. Heat up the die cast on the paint stand with a hair dryer before spraying the primer. This is to make the paint dry up faster and more evenly, especially in areas that are in the shadow when put under the sun (Thank you Yeo for this tip). Alternatively, you can leave it out in the sun for about 10-20 minutes before spraying.
4. Hold the spray can about 20-25 cm away from the die cast at all times. Your paint on the die cast should be a moderate coat. If you see paint drip/buildup in some areas then your coat of paint is too thick.
5. When spraying, go consistently in one direction (front to back, or vice versa).
6. After a coat of spray, leave it to dry for about 10-20 minutes before spraying the next coat. Make sure your current paint coat is completely dry before spraying on another.
7. After every coat if you find that the paint is uneven, you can smoothen it further by wetsanding the paint. Simply dip your sandpaper into water and gently sand it over the body. Make sure your sandpaper is always wet and your paint coat completely dry. Do not apply a lot of pressure, and only wetsand the paint if it is not your last coat. Usually wetsanding is to smoothen the current coat so that the next coat that goes on top will not carry the same defects.

custom mustang gt
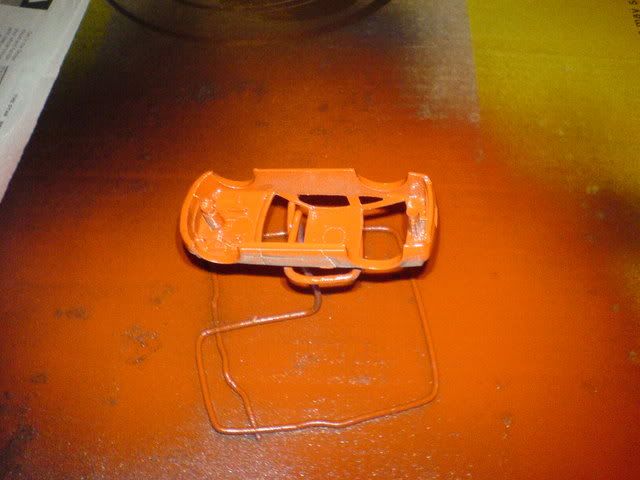
Spraying primer upside down.
custom mustang gt
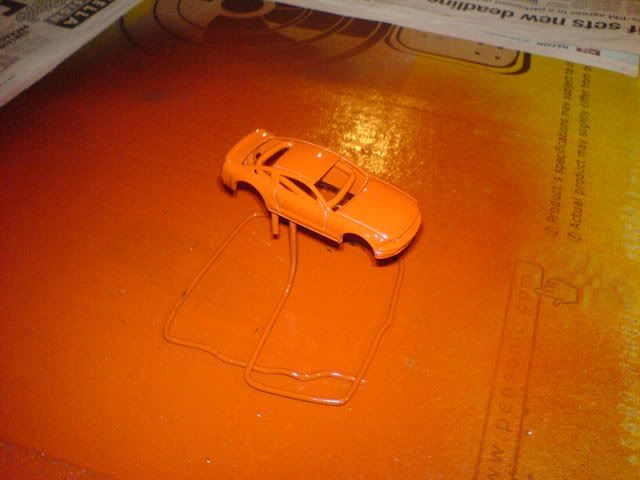
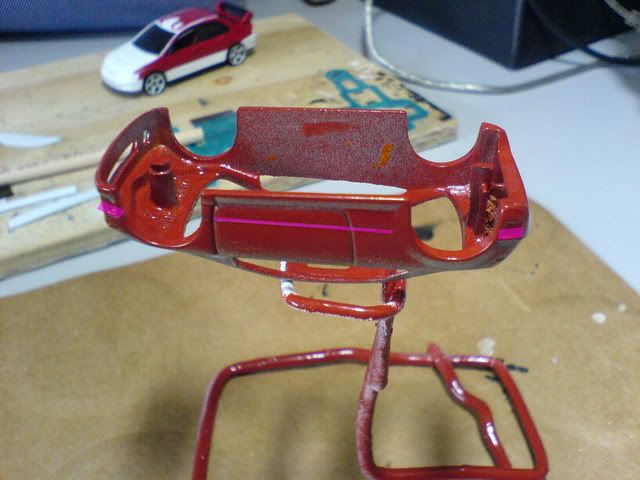
Spraying primer right side up.

When you start spraying, I usually start by turning over the die cast and spraying the bottom first. The spray coat that comes out of the can will coat the die cast from top. The areas curved towards the bottom or facing downwards will not get any paint. So in order to get paint over the areas where the spray cannot reach when it is right side up, I start by spraying it upside down. Then after that I proceed with spraying it right side up.

Photobucket
Photobucket
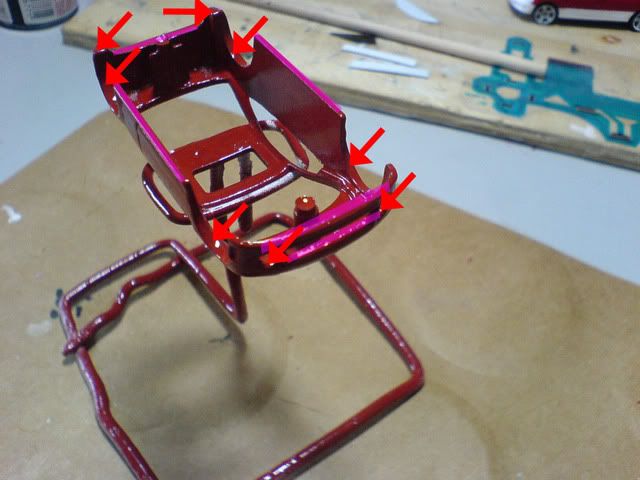
Areas in pink and pointed by the arrow shows the areas the spray will not reach if sprayed right side up. Spraying upside down covers these areas.

Then the same applies for your base colour. Spray one coat upside down, and then proceed with as many coats right side up until the die cast is covered evenly with the colour you chosen. I usually go with two to three coats of paint. The point is to have an even coat of paint all over the die cast without compromising the details on the die cast mould. If your paint is too thick, the details will be covered. Try experimenting with the number of coats if you are painting for the first time to see how many coats is the optimum for you.

custom mustang gt
Custom Mustang in white after base colour coats.

From here, you can proceed to spraying a gloss (or clear lacquer) coat over the car to protect the paint. For gloss, just one coat is sufficient and there is no need to spray it upside down. You can, but I would suggest you not to.

If you would like to take it to another level, Add a black hood or racing stripes! Right after your base coat, follow up by masking the die cast with masking tape and then spraying one or two coats of paint over the body before glossing. Below are some examples of masking that I have done previously.

custom mustang gt
custom mustang gt
custom mustang gt
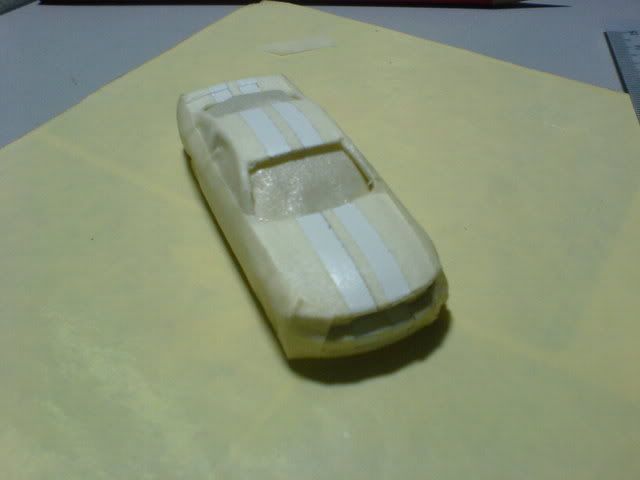
Ford Mustang GT racing stripes.

custom vw golf gti
custom vw golf gti
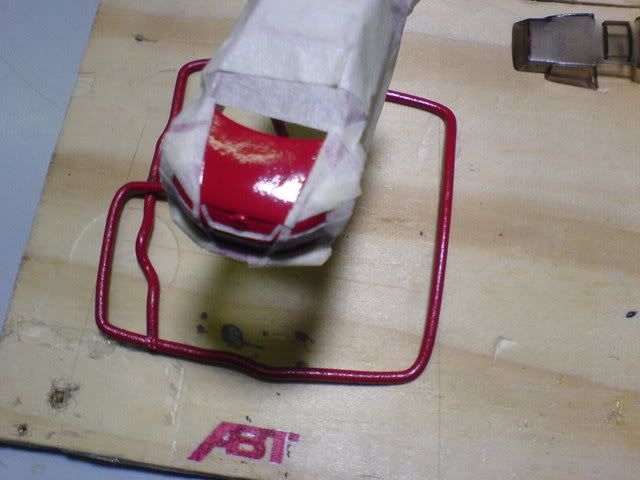
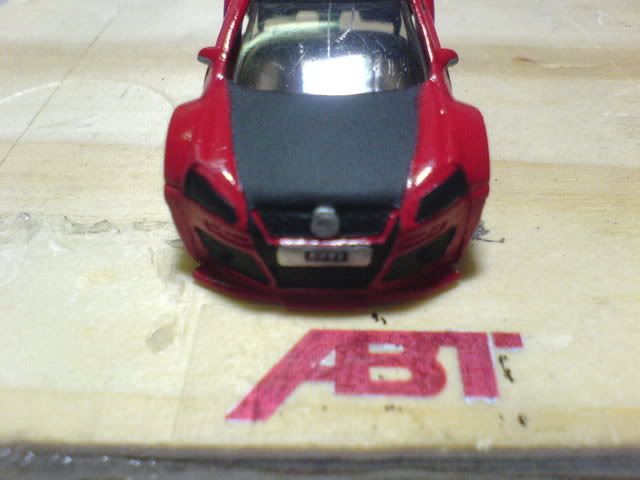
VW Golf GTI's black hood, radiator grills & head lamps.

I know this post is quite long, so if you have any questions along the way feel free to ask in the comments section. Do suggest better methods too if you have discovered some, so we can all learn together! :-)

Happy painting!

Next post: Painting (Interior)
Previous post: Pre-paint Preparations (Part 2)

Thursday, January 8, 2009

Kustom Method: Pre-paint Preparations (Part 2)

KM tag

Okay, today we go back to some custom tips! After all your putty has hardened, shaped and sanded, it is time to prep the rest of your die cast body for painting. What we will cover in this blogpost, is basically sanding out the body so that your paint job will be smooth and removal of mould lines and seam lines (thanks cham for teaching me on this).

In this prep, you will need:
1. A low grit sandpaper (About 100-200)
2. A high grit sandpaper (About 1200-1500)

civic custom

For this post, I will be using the Civic Si custom as illustration. And if you remember, after paint stripping on the body, there was still bits of paint and the surface was not smooth as you can see from the picture above. So we are going to iron those issues out.

Let's tackle the mould lines and seam lines first. What are they? Mould lines are lines protruding out of the die cast body which is not part of the car's body structure. They usually run from top to bottom, and are found at the corners of the body. Seam lines are like a gutter that run across the body, and is opposite from mould lines. Instead of protruding, they look like they are dug in.

How do we deal with mould lines and seam lines? For mould lines, we usually sand them off since they are extra bits of metal sticking out. As for seam lines, you will have to fill them using putty as I have described in part 1 of the pre-paint prep, and then sand off the excess putty till it is smooth.

Let me show you an example of a mould line. In the Honda Civic Si custom that I am doing, mould lines can be found at all four corners of the die cast. Look at the picture below:

civic custom

See the vertical line running from slightly above the rear lamps all the way to the bottom of the bumper? That's a mould line right there. To remove it, I first use a low grit sandpaper (I used 180) and then smoothen it using a high grit sandpaper (I used 1200).

civic custom

This is another example of mould line, running from the top of the hood till the bottom of the front bumper. Again, I sanded them off using a low grit sandpaper, then smoothened the surface using a high grit sandpaper.

After sanding, this is what the rear and front looks like.

civic custom
civic custom

Notice the rear mould line is not completely gone. The bit above the headlamps is a bit too rough so i just sanded off as much as I can. Perhaps I was not hardworking enough. As for the front, the mould line is almost invisible. After a few coats of paint, it will be covered and invisible.

To smoothen the rest of the body, simply use a high grit sandpaper (I used 1200, again), and sand all over the body until you can feel that it has become smooth. If there are stubborn bits of paint, simply use a lower grit sandpaper and sand it off before smoothening it with a high grit sandpaper.

civic customcivic custom

After you're all done, the body should be like in the picture above. No mould lines or seam lines, and the metal is smooth and shiny! To be honest I actually sanded the body first then filled the holes, but I blogged it the other way round. Both ways are alright, just do whichever that suits your style. :-)

Hope this post has been of help! Once again, any questions or comments just fire away in the comment section. Cheers!

Next post: Painting (Exterior)
Previous post: Pre-paint Preparations (Part 1)

Tuesday, January 6, 2009

Kustom Restoration: The Demon

Recently a good friend nicknamed demonicle requested I do a simple custom for him. Since his nickname was demonicle, he handed me a car named "The Demon" to be customized. He wanted The Joker tempo from Batman: The Dark Knight since his avatar on the forum was exactly that. So he passed me the carded car which looked like this:

image from southtexasdiecast.com

Initially, I just did some sticker fabrication on the sides and back.

Custom sticker (Demonicle)

After looking at it, he said he wanted a wheel swap and a revised tempo at the side too. I agree, the plastic wheels, despite the red line, won't look as good as rubber wheels. So I got a donor, and swapped wheels for it and fabricated new side tempos for it. :-)

Photobucket
Photobucket
Photobucket
Photobucket
Photobucket
Photobucket
Photobucket

That looks better! The eyes are more visible, so from quite a number of angles the Joker's eyes look as if it is looking at you. Plus, the rubber wheels made it look a bit more menacing yet classy. And add a final touch...

Restoration #4 - 5/1/09

Sunday, January 4, 2009

Kustom Method: Pre-paint Preparations (Part 1)

KM tag

Welcome back to this segment for the new year! I will be picking up where I left off, which is the process of preparing the die cast body for painting. This will be a two-part post, as this part will be covering on the putty work and the next part will be on sanding.

civic custom

When we last left the body, the paint has just been stripped. What's next?

For this Civic custom, my friend has requested that the rear wings to be removed and left flat, so there are two holes at the back of the car to be filled. Sometimes, there are other holes that you would like to fill, such as the hole in the headlamp in the Nissan Skyline custom. To fill up the holes and make a smooth surface, I use a multipurpose epoxy putty. I will knead the putty, then use it to fill up any holes, and finally sand it into shape. Get it?

Let's begin.

You will need:

civic customcivic custom

1. Multipurpose Epoxy Putty (I used Selley's Knead It)
2. A blade
3. Your die cast

civic custom

As I have mentioned before, we are to fill the two holes left by the rear wing that has been removed from the body as shown in the picture above.

civic custom

First, just slice out as much putty as you need.

civic custom

Then place it above the area you want filled. Then shape or take off the putty bit by bit until it is fits the shape of the body. You have about 3 minutes from the time you knead the putty to do so before it hardens. I have done it for both the holes, it should look like the picture below.

civic custom

I don't know if you can see it from the photo, but the area filled by the putty is still quite rough. However, we cannot sand it yet. The putty must be left to dry for approximately 5-10 hours so that it hardens. Once it is completely hard, you can sand it so that it becomes flat and smooth, blending it together with the body. I used a 1000 grit sandpaper to sand it flat, then a 1500 grit sandpaper to smoothen the surface.

Photobucket

As you can see from the picture above, the putty has been sanded and it is now flat. After all the filling is done, you are ready for the second part of the pre-paint preparations!

Questions? Comments? Use the shoutbox or the comment link below. Thanks for looking! :-)

Next post: Pre-paint Preparations (Part 2)
Previous post: Paint stripping