After a long layoff, I hope you haven't abandoned your customs but have been trying out some of your own ideas. Anyway, I am back with this post and although I haven't been doing much customs here, I hope that with pictures that I have previously will help me help you in your die cast customizations. :-)
Okay! So the order of today would be wheel swapping. So the bulk (or almost all) of my customs have been for Hot Wheels die casts, and through my experience I have discovered a few things:
1. Not all wheel axle lengths are the same.
2. Hot Wheels die casts' wheels are pretty much the same, so you may have to end up buying a more expensive brand just for the wheels to make your custom work. Sometimes there are better looking wheels that are cheaper, so if you can find those all the better then.
3. You may end up locking the wheels on the first time trying. I did. Its normal, and it doesnt mean you failed.
4. Die casts with metal base are a pain in the butt to swap wheels, try to avoid them unless you have proper tools.
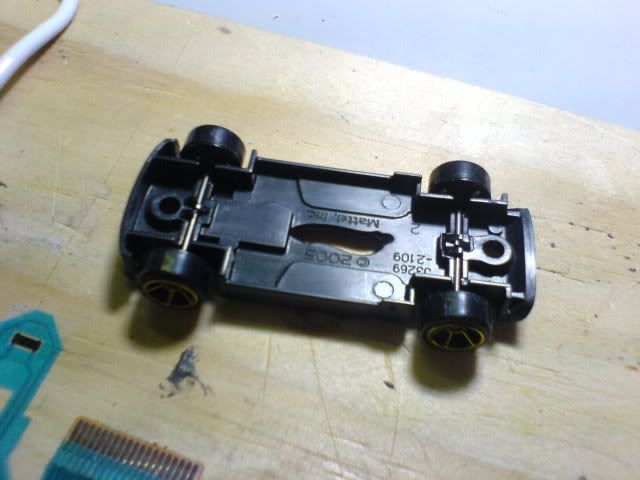
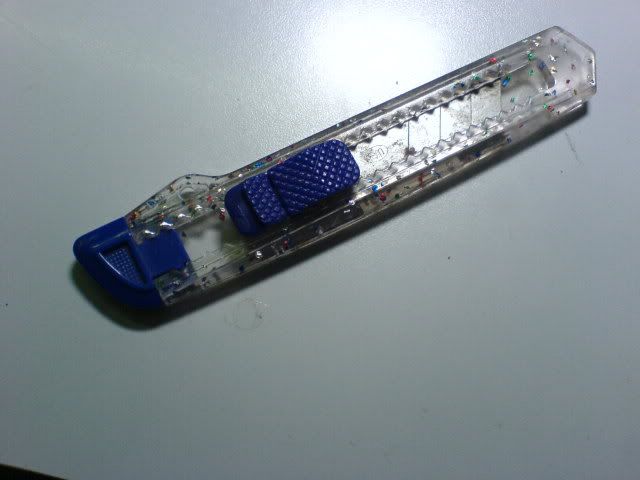
What tools do I need, you ask? I will first tackle on the matter of removing wheels from a die cast with a plastic base. Assuming you have removed the rivets (by hook or by crook), and got the base open, you will need just a normal blade cutter.
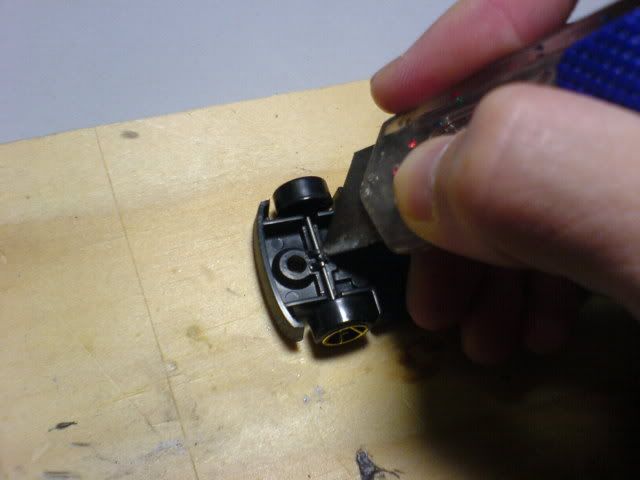
Then simply just use the blade to cut off the plastic tabs holding the car in place.
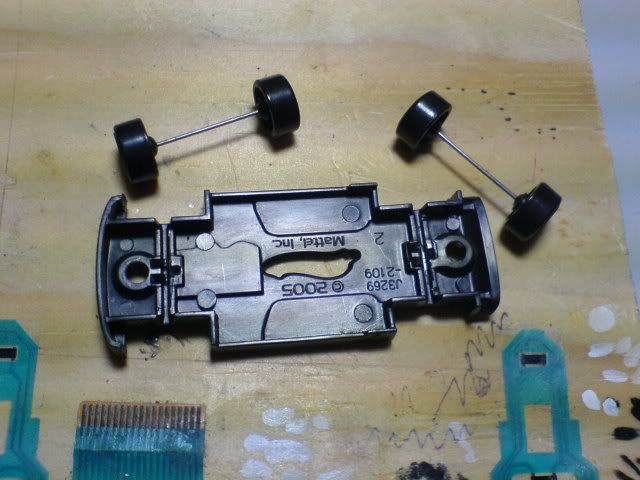
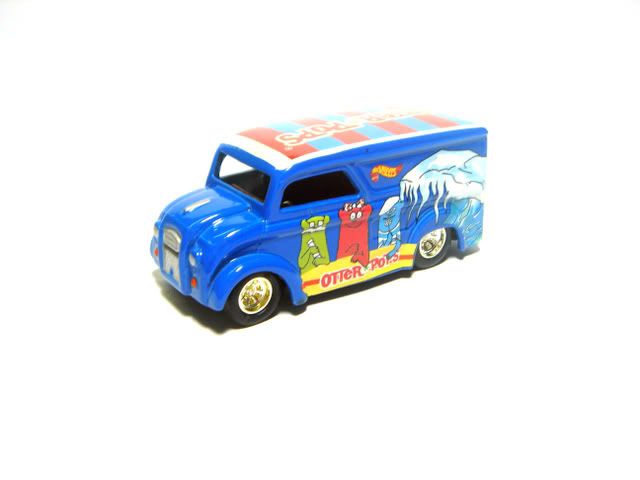
Here's another example, I removed the wheels off a Dairy Delivery:
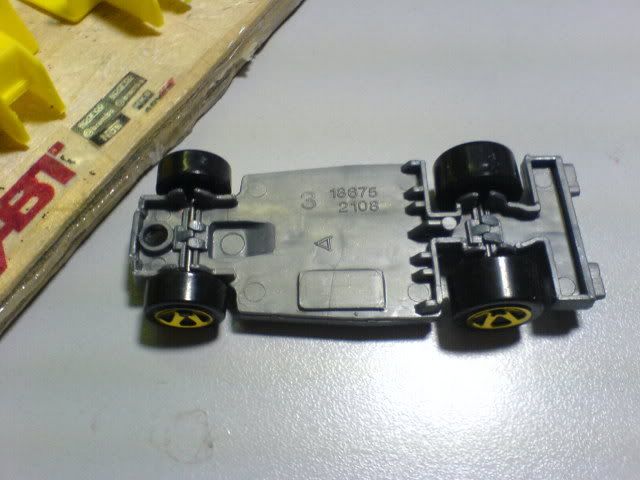
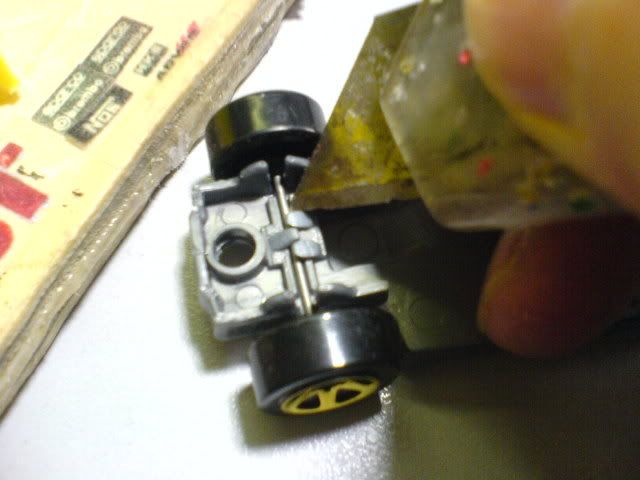
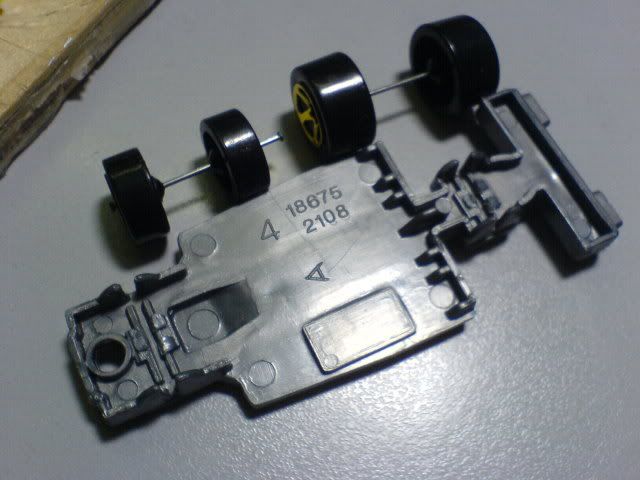
By now you may or may not have noticed this method will not work for a die cast with a metal base. So for example, if I wanted wheels from a 16 Angels Super T-Hunt for the Dairy Delivery, how will I remove the wheels?
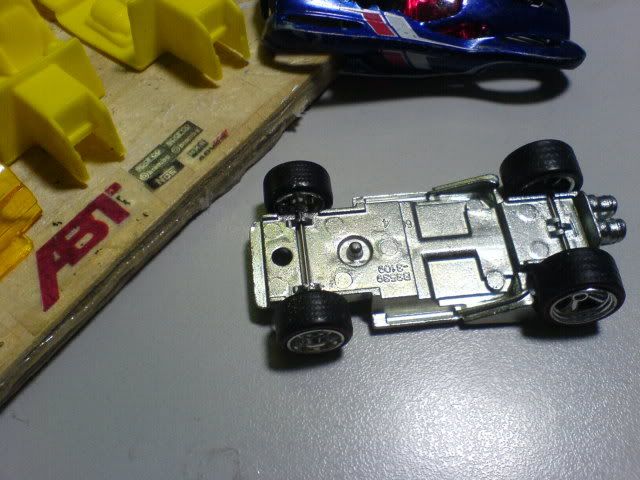
I would recommend you to use a rotary tool with a cutter for this, which is ideal since you can grind away at the metal tabs. However, I do not own a rotary tool of my own, so here's my best suggestion: Use a small handsaw or the blade of a handsaw. It is much cheaper, but you will have to get a bit creative on how to saw the metal tabs.
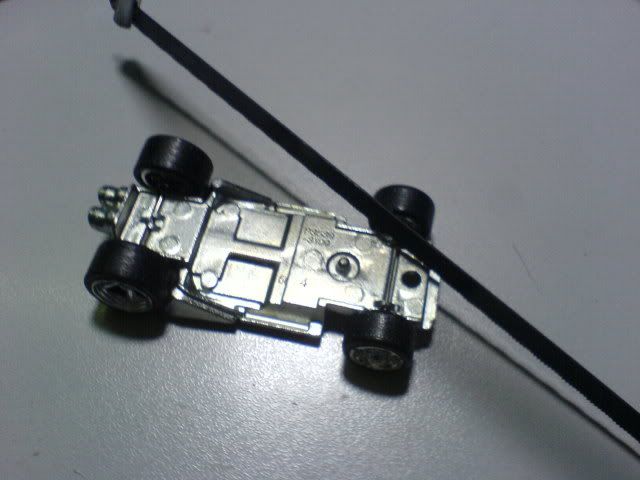
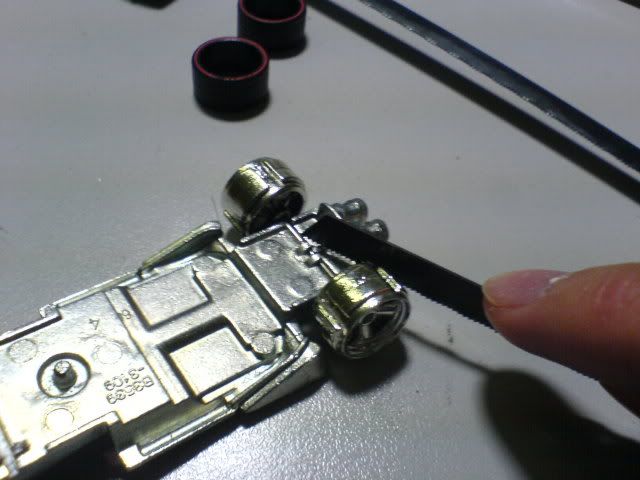
This method is a lot harder, since it will take some patience and a lot of effort to get the metal tabs off. However, if you have no rotary tool, this is the next best thing that I can recommend to you.
Now, the point of wheel swapping is to give your die case a better or more realistic wheel. Just keep your eyes peeled for various wheel sources in your local toys department. You do not always have to get wheels only from Hot Wheels or Matchbox. I have used wheels from various brands: Jada Toys, Maisto, High Speed. Granted, they may be more expensive than the Hot Wheels basic car that you bought, but investing in the right wheels will take your custom to the next level!
Here are some of the wheel donors for my previous customs:
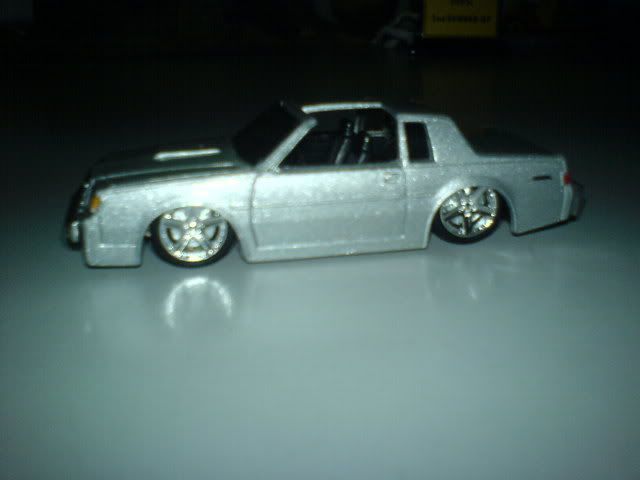
Wheel source: Maisto.
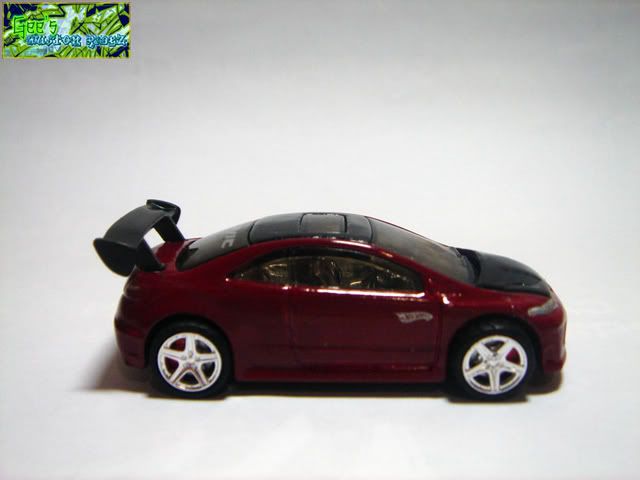
Used for custom: Honda Civic Si.
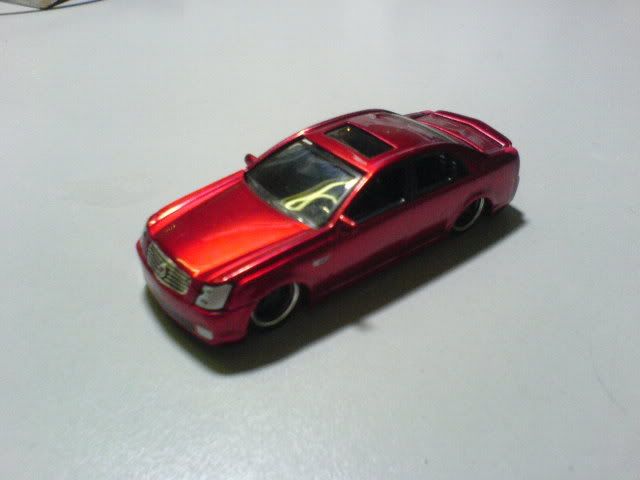
Wheel source: Jada Toys.
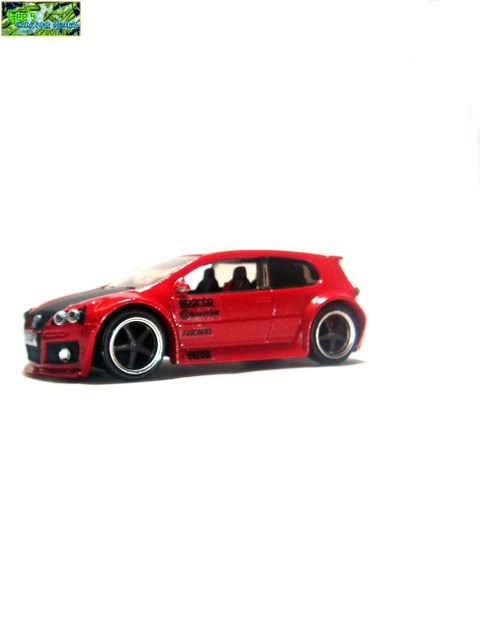
Used for: VW Golf GTI
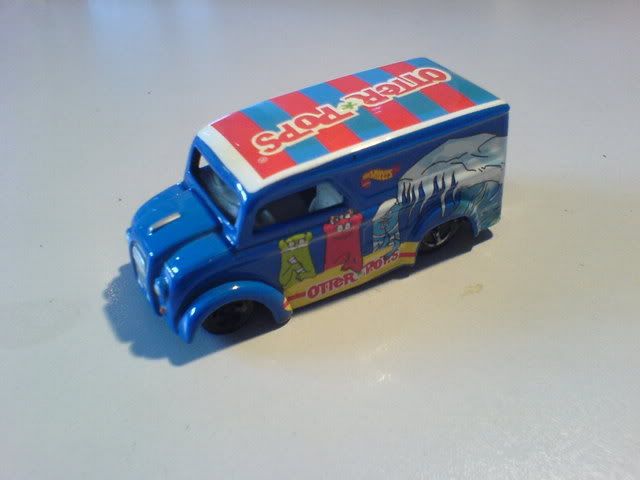
Before.
Already looks better, don't you think so?
Now, when you look for other wheels besides Hot Wheels wheels, you may have noticed that they are not the same. Wheels can be generally categorized into two types:
1. Free-wheeling wheels.
This are the type of wheels that you can find on Hot Wheels, Matchbox and Tomica die casts. They are independent of the axle and can rotate freely even when the axles are locked in place.
Pros: Easy to work with, available everywhere.
Cons: Many wheel axle variants, hard to adjust axle widths to suit the base.
2. Anchored wheels.
These wheels are locked onto the axles, and rotate as the axle rotates. Basically the whole wheel system rotates together (both wheels and the axle). Most of other toy cars besides those mentioned above carry these type of wheels.
Pros: Axle widths are easily adjustable.
Cons: Wheels may not be able to rotate after reassembly.
As mentioned above, there are problems with both wheel types. If possible, for free wheeling wheels, try to get donor wheels of the same axle length. If they fit, simply place the wheel back into the channel and glue where the metal tabs used to be. I would not recommend using superglue for this, for reasons I will explain below. If the axles do not fit, I have a solution, but it is not really recommended. However, in real life nothing is ever ideal so this is my best solution to the problem.
What I do is I cut the axles into half and trim them until they fit. Then i suspend the base high enough while I glue both parts of the axle back on the base. Make sure as the glue is drying, the base is suspended in such a way the wheels are aligned straight. This is because when the glue has not harden, the axle may tilt and move. For glueing wheels back into place, I recommend using Epoxy, not superglue. This is because superglue tends to run and it may seep to your wheels and end up locking the wheels on the axle. Epoxy will take a longer time (5-8 hours) to harden completely, but it is much stronger and it doesn't seep or run down the channel.
As for anchored wheels, shortening axles is easy. You just have to remove one wheel, cut the axle to the appropriate size then replace the wheel back into the axle. If the axle is too short, you may have to find some metal bits that will replace it as an axle. I use paper clips to do this, as I bend the paper clip straight and cut the length I need for the axle. If the channel is too small for the axle, you may have to saw it using a handsaw or sand it using a low grit, rough sandpaper. Since the wheels are anchored you do not glue the axle to the base. Hot Wheels die cast, in my experience, are usually made in such a way that when you have glued the base back onto the casting, the two pieces usually clamp the wheel axles. So you simply have to glue the car back together for this type of wheel. This does not apply for all cars so do remember to check out both your custom and donors' wheels and axles before deciding on what type of wheels to use.
Unfortunately I do not have photos to show these processes, and I apologize. Usually it takes quite a bit of concentration and precision so I always forget taking photos. Feel free to ask any questions in the comments box though, I will gladly answer them. Cheers. :-)
Next post: Tempo
Previous post: Painting (Interior)
Okay! So the order of today would be wheel swapping. So the bulk (or almost all) of my customs have been for Hot Wheels die casts, and through my experience I have discovered a few things:
1. Not all wheel axle lengths are the same.
2. Hot Wheels die casts' wheels are pretty much the same, so you may have to end up buying a more expensive brand just for the wheels to make your custom work. Sometimes there are better looking wheels that are cheaper, so if you can find those all the better then.
3. You may end up locking the wheels on the first time trying. I did. Its normal, and it doesnt mean you failed.
4. Die casts with metal base are a pain in the butt to swap wheels, try to avoid them unless you have proper tools.

What tools do I need, you ask? I will first tackle on the matter of removing wheels from a die cast with a plastic base. Assuming you have removed the rivets (by hook or by crook), and got the base open, you will need just a normal blade cutter.

Then simply just use the blade to cut off the plastic tabs holding the car in place.


Here's another example, I removed the wheels off a Dairy Delivery:


By now you may or may not have noticed this method will not work for a die cast with a metal base. So for example, if I wanted wheels from a 16 Angels Super T-Hunt for the Dairy Delivery, how will I remove the wheels?

I would recommend you to use a rotary tool with a cutter for this, which is ideal since you can grind away at the metal tabs. However, I do not own a rotary tool of my own, so here's my best suggestion: Use a small handsaw or the blade of a handsaw. It is much cheaper, but you will have to get a bit creative on how to saw the metal tabs.


This method is a lot harder, since it will take some patience and a lot of effort to get the metal tabs off. However, if you have no rotary tool, this is the next best thing that I can recommend to you.
Now, the point of wheel swapping is to give your die case a better or more realistic wheel. Just keep your eyes peeled for various wheel sources in your local toys department. You do not always have to get wheels only from Hot Wheels or Matchbox. I have used wheels from various brands: Jada Toys, Maisto, High Speed. Granted, they may be more expensive than the Hot Wheels basic car that you bought, but investing in the right wheels will take your custom to the next level!
Here are some of the wheel donors for my previous customs:

Wheel source: Maisto.

Used for custom: Honda Civic Si.

Wheel source: Jada Toys.

Used for: VW Golf GTI
Here's how a simple wheel swap can drastically improve the look of a die cast. I simply swapped the worn out wheels with a Jada Toys' wheels for this Dairy Delivery.

Before.

After.
Already looks better, don't you think so?
Now, when you look for other wheels besides Hot Wheels wheels, you may have noticed that they are not the same. Wheels can be generally categorized into two types:
1. Free-wheeling wheels.
This are the type of wheels that you can find on Hot Wheels, Matchbox and Tomica die casts. They are independent of the axle and can rotate freely even when the axles are locked in place.
Pros: Easy to work with, available everywhere.
Cons: Many wheel axle variants, hard to adjust axle widths to suit the base.
2. Anchored wheels.
These wheels are locked onto the axles, and rotate as the axle rotates. Basically the whole wheel system rotates together (both wheels and the axle). Most of other toy cars besides those mentioned above carry these type of wheels.
Pros: Axle widths are easily adjustable.
Cons: Wheels may not be able to rotate after reassembly.
As mentioned above, there are problems with both wheel types. If possible, for free wheeling wheels, try to get donor wheels of the same axle length. If they fit, simply place the wheel back into the channel and glue where the metal tabs used to be. I would not recommend using superglue for this, for reasons I will explain below. If the axles do not fit, I have a solution, but it is not really recommended. However, in real life nothing is ever ideal so this is my best solution to the problem.
What I do is I cut the axles into half and trim them until they fit. Then i suspend the base high enough while I glue both parts of the axle back on the base. Make sure as the glue is drying, the base is suspended in such a way the wheels are aligned straight. This is because when the glue has not harden, the axle may tilt and move. For glueing wheels back into place, I recommend using Epoxy, not superglue. This is because superglue tends to run and it may seep to your wheels and end up locking the wheels on the axle. Epoxy will take a longer time (5-8 hours) to harden completely, but it is much stronger and it doesn't seep or run down the channel.
As for anchored wheels, shortening axles is easy. You just have to remove one wheel, cut the axle to the appropriate size then replace the wheel back into the axle. If the axle is too short, you may have to find some metal bits that will replace it as an axle. I use paper clips to do this, as I bend the paper clip straight and cut the length I need for the axle. If the channel is too small for the axle, you may have to saw it using a handsaw or sand it using a low grit, rough sandpaper. Since the wheels are anchored you do not glue the axle to the base. Hot Wheels die cast, in my experience, are usually made in such a way that when you have glued the base back onto the casting, the two pieces usually clamp the wheel axles. So you simply have to glue the car back together for this type of wheel. This does not apply for all cars so do remember to check out both your custom and donors' wheels and axles before deciding on what type of wheels to use.
Unfortunately I do not have photos to show these processes, and I apologize. Usually it takes quite a bit of concentration and precision so I always forget taking photos. Feel free to ask any questions in the comments box though, I will gladly answer them. Cheers. :-)
Next post: Tempo
Previous post: Painting (Interior)

4 comments:
nice tutorial... hehe...
thanks bro! hope it provides you with some information to help you with your custom :)
What do you use for axle replacements?
It always seems I find nice wheels on an axle that is wider than the car...or too narrow...and need to create an axle for the wheels.
I've been using hat pins with a little bead of solder on the end. It works but can probably look better.
Just wondering how you go about that.
Great site with lots of great info. I'll be checking back often and if you're interested, I would like to interview you for the Redline Derby web site.
hi gee. I have another question. How can i remove both wheels form the axle?
Post a Comment